Showing posts with label Maybelline New York. Show all posts

Wednesday, 12 February 2014

Simple Valentines Day Look

With Valentines Day lurking around the corner I thought it would be kinda nice to do a little hair and make-up look for the day. So far I think my boyfriend's plan for the day is to go out in the stormy, windy, rainy weather that's creating all kinds of devastation across the south-east of England at the moment, and I quote, 'test our waterproofs out'. Super romantic, I know. But its time spent together, plus I get a Domino's pizza at the end of the day!

The make-up look is super easy and very natural looking perfect if your like me and don't like anything too over the top and the hair is cute and girly.

So lets start with the list of make-up I used to achieve the look:


For starters I primed my face with my MUA Matte Perfect Primer to give an even complexion. Then I used my Avon Ideal Flawless Foundation, all over my face. For a cheeky burst of colour I applied my MUA blusher in Bubble Gum to the apples of my cheeks, then swept a little highlighter across the top of my cheeks, I used the MUA Undress Your Skin Shimmer Highlighter. (I bought a few new MUA products so I've been trying them out!) Using my Maybelline New York Brow Pencil and Brow Drama Brow Mascara I filled in my brows to help frame my face. Next up is the eyes....

MUA Glamour Days Eye Shadow Pallette

Click the photo to enlarge for a better image.

Taking shadow 1 a pale gold colour, I applied this all over my lid just using my ring finger(1). Next up I used shadow 2 a slightly darker gold colour, I applied this from the center of my eye, out (2) Again just using my finger. Final shadow 3, a pretty pink colour, I applied this to the outer corner of the eye (3). All 3 of these colours are fairly shimmery so they make the eye appear bright. After applying my shadows I used my MUA Waterproof Liquid Liner to draw a thin-ish line along my eye with a gentle flick at the end(4). Then a quick slick of L'Oreal's Lash Millions Mascara in Ultra Black(5) and I'm almost done! The Finishing touch is highlighting my brow. With such shimmery shadows my brows needed a little lift and to do this I used my NXY Jumbo Eye Pencil in Cottage Cheese to draw a line under my brow and over(6), then blend it out with my ring finger (7).

Lastly I used a combination of Revlon Colour Burst Lip Butter in Strawberry Shortcake and L'Oreal Caresse in Rose Mademoiselle to create a subdued pink pout.


My hair style is simple but effective looking. Start by dividing hair into a deep side part and continue it down to the nape of the neck so you have 2 sections. Clip the biggest section to the side out the way. Then dutch braid in a diagonal line towards the back of your head and tie off. To create some girly dimension to my hair I used my Babyliss Curling wand to create some deep curls to the hair that I had left. Sweeping all hair to one side (the side we curled) pull the braid through so it rest next to your neck. Pull out the hair elastic and get a grip on your 3 strands of braid. Add a little section of hair (from the curled hair) to the strand furthest from your face, then braid once. Then add another little section of hair, to the same side and braid again. Continue this till you are almost fully down your hair, then braid normally and tie off. So we only added hair to one side of the braid, this is called a lace braid. I'll do a post of different braids in the future so you'll get to know what I'm taking about in my hair posts. So if these instructions were confusing, (which I assume they were!) click HERE to see the video where I learnt how to do this :) 

The completed look. Natural looking and girly. And yes I burnt my neck with my wand.

I hope you enjoyed this post, let me know if you try the look out! And remember you don't have to have a partner to feel special on Valentines Day. Have a day to pamper yourself and relax. Self Love is the most important Love of all :)

Jeni x


Tuesday, 17 December 2013

Get Ready With Me: Christmas Party

Christmas is getting closer and closer guys!
Sunday just gone (15th) I had my work Christmas Party, and so I thought it would be fun to have a go at a 'Get Ready With Me' post. I love watching these sort of videos and thought I'd give a go at translating it in to a post!

So here it is!


So lets start out with the face!


To start out I primed my face with my Garnier 5sec Perfect Blur. Once all lovely and blurred I applied a thin covering of my Avon Ideal Flawless foundation, then a thin layer of my B. Naked  foundation to keep my colouring as natural as possible. Once dry I used my Mac Pro Longwear concealer brought out for special occasions or when my skin is particularly bad, to just hide any blemishes. Finally I set all this with a sweep of my Maybelline Fit Me! powder. 
To colour my cheeks I used my MUA blush in shade 1 on the apples of my cheeks. For lips I used one of my favourite lipsticks the Barry M Magic Lipstick, I also topped this with a NYC lip gloss in a bright pink shade that I forgot to photograph. This was the perfect lip combo for the evening as the lipstick doesn't budge and to keep it looking vibrant all that is needed is a slick of gloss to brighten it up. Perfect!


My eyes I kept really simple as I was pushed for time. To start I filled in my brows using my Maybelline brow pencil, then added my NXY Eyebrow Cake on top to add more depth and definition. Finally finishing with a sweep of my Maybelline Browdrama to keep it all in place. 
To give my eyes a little bit of sparkle I used one of my favourite eye shadow/shimmers by Collection, Dazzle Me! in Magical - its amazing like fairy dust. It has a slight gold undertone, so pretty.
Once all lightly sparkeld I added a thick sweeping cat line of my Revlon Colour Stay liner and a generous helping of Natural Collection Lash Length mascara. 
And then my makeup was done!

Annoyingly your can't see the shimmer! But its there I promise just too subtle I guess!

Love this pretty combination!


Hair again is super simple I used my faithful ghd's to give my hair soft curls. Once cool I love to comb through my curls to give them a soft, fluffy, natural finish. Then using a pump of argon oil I rub this through the curls to keep them shiny and hydrated.

The completed hair and makeup. 
I wanted to keep it simple and flawless look as my dress is sparkly!


For nails I picked a contrasting yellow to go with my blue dress, this ones by Miss Sporty.


My dress is from Lipsy, Shoes and Bag both from New Look and Necklace George at Asda.


I don't have a full photo of the outfit, but I do have this rather sassy picture taken on the night!

Suits me no?

Hope this post wasn't too long for you!
Let me know what you think :)

8 More Days!

Jeni x


Tuesday, 5 November 2013

Bonfire Night!

Remember, remember the 5th of November
Gunpowder, treason and plot!

Yup its Bonfire night y'all!
So throw on a coat, grab your scarf and go set fire 'guy'
Oh!
&
watch some pretty, sparkly fireworks!

I put together a little eye look inspired by the super pretty awesome fireworks.


It 'aint nothing too fancy but there's sparkle's


Products used:

+ Soap & Glory Its About Prime Eye Shadow Underbase in Bright Light
+ Natural Collection Eye Shadow in Snowstorm - All over the lid
+ MUA Glamour Days Eye Shadow Pallet: 
Purple from the mid 3rd of eye out to the corner
Blue last 3rd of eye
Light Gold inner 3rd
+ George Velvet Eye Shadow in no.28 Paparazzi - Outter V
+ NXY Liquid Crystal Liner in Crystal Pewter - Lining top and bottom lash line
+ Revlon Colour Stay Liquid Liner in Black 
+ Natural Collection Eye Shadow in Midnight - to line water line
+ Maybelline NY The Falsies Flare Mascara in Black

This look was much more sparkly in the flesh, the Crystal liner is sooo spraklicious!
It didn't turn out quite as I had hoped but hey! I'm no make-up artiste!

Hope you like and have a fantastic bonfire night!

Jeni x


Monday, 4 November 2013

Maybelline NY Brow Drama Review | Updates

Happy Monday!
Today I will be reviewing Maybelline's Brow Drama sculpting Brow Mascara.

Dark Blond £4.99 for 7.6ml 


I'm not big on the packaging it looks really cheap!


The colour's not bad and I think if you had fairer eyebrows than me this wouldn't be a bad colour match.
The spoolie is interesting to work with. The bigger fluffier ball at the tip is good for getting a light amount on to the fluffier inner parts of your eyebrow's [hope that makes sense]. But then you need to use the tighter thinner coils on the mid-ends of your brows, but the fluffy end works just as well.


As for the effect on your brow's, it isn't massive.


Its effect is very subtle and natural looking. 
More of a neatening mascara than anything with real substance.
I'd been looking forward to trying this because I've seen some other brow mascara's used in youtube tutorials and they look like they work really well.
I was sadly a bit disappointed with this. I had hoped it might help to lighten my brows after I apply my brow powder but it didn't really do that.
I don't particularly like wearing it with out a powder underneath but it is good if your not in the mood to fill in your browser and just want a hint of colour and tidyness.

Although this wasn't what I hoped it would be I think its a good way for some one who wants to begin filling in their brows but is a little nervous about it, to try out.
The effect is so subtle you won't look too different.
I remember the first time I filled in my brows I was a bit shocked at the difference and a bit unsure, but I'm so glad I do it now.


Time for Updates!

Just a quick update with my oil-cleansing journey. Its now been over 6 weeks and I still like using this method to rid my face of dirt and makeup of an evening.
I'm still using the mix of Jojoba oil and Castor oil.
My oiliness is much better but I think that could have something to do with a new moisturiser I'm using [review to come] and sadly I can't say my skins super clear because I have a small breakout [hormonal acne, yup TOMs visiting]
So I plan to carry on using this method of cleansing and this is the last update that I will do, unless all of a sudden I have perfect skin and I think this is the reason for it!
:P

&

Finally I made Elf's Beauty a FACEBOOK page so if your not a blog follower but want to keep up to date with me come like my page! And if you are a follower come like it too!

Thanks for reading!

Jeni x


Thursday, 31 October 2013

Happy Halloween!

I
Love 
Halloween!

But sadly I have no Halloween party to go to
&
I'm a tad old for trick or treating!

So I decided to put together this dark, vampy look.

Which I sort of love!

I've never been good at selfies!


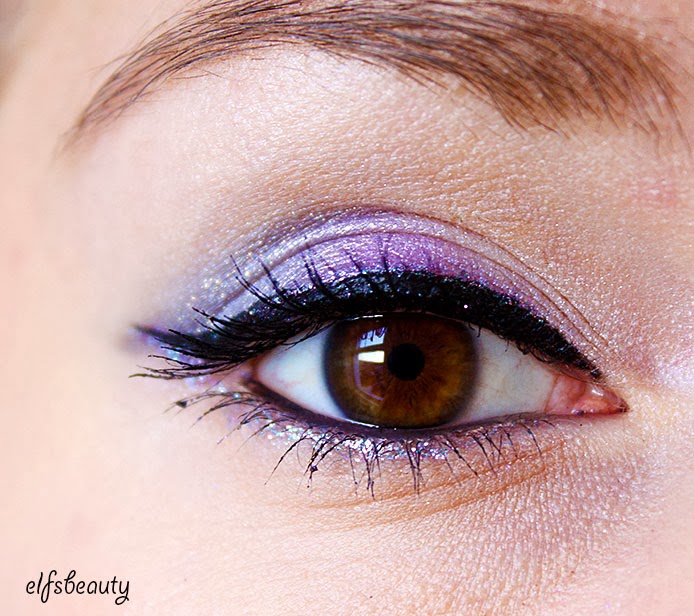
My eyes are dark and smokey but I used a pearlesant white shade to add a soft glow.
I used brown to create a depth in the outer hollows of my eyes and a black shadow to line my upper and lower lashes and my outer V, gently smoking. I thinly lined my eyes with liquid liner, carrying the liner out rather than into a cat-eye flick.
To finish a slick of mascara to the top and lower lashes and lining my tight line with my liquid liner.


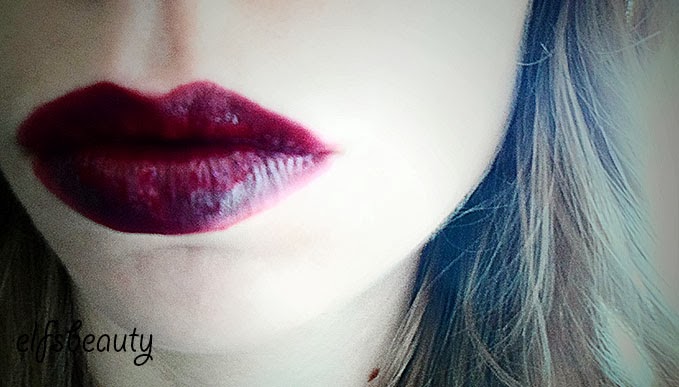
I used a dark red lip liner and dark plumb lipstick on the whole of my lips and a deep red lip gloss to in the inner section of my lips to add a lil something something!


For nails I've been rocking a black & white crackle look that kinda looks like skulls..maybe!

List O' Products:

+ Boujois Healthy Mix Serum Gel Foundation in no.52 Vanilla
+ Natural Collection Cover Up Cream in Fair
+ Maybelline Fit Me Pressed powder in no.125
+ NXY Eyebrow Cake Powder in Blonde
+ Soap & Glory It's About Prime Eye Shadow Underbase in Bright Light
+ Natural Collection Eyeshadow in Snow Storm
+ Natural Collection Eyeshadow in Asteroid
+ Natural Collection Eyeshadow in Midnight
+ Revlon Colour Stay Liquid Liner in Blackest Black
+ Natural Collection Lash Length Mascara in Black
+ Rimmel Lasting Finish 1000 Kisses Lip Pencil in no.063 Black Tulip
+ Collection Gothic Glam Lipstick in no.2 Scorned
+ NXY Mega Shine Lipgloss in no.133 Burgundy
+ Barry M Nail Paint in Matt White
+ Barry M Nail Paint Instant Nail Effects in Black


Hope you like!

Happy Halloween!

Jeni x


Monday, 16 September 2013

Quick Tips | Smudge Proof Lashes

Hi Kitties!

I'm going to try and introduce a new element to my blog
Quick Tips
So these will be little tips I've learnt along the way that I think are worth sharing!

Today I'm going to share a tip that I read about from a teen mag when I was like 13-14.
At the time I wasn't big on makeup and sort of forgot about it till now!
I've recently started wearing mascara on my lower lashes again - I'd stopped because I was fed up with getting panda eyes all the time!
Then I remembered this little tip I read - and it works!

All you will need will be:
A Face Powder
&
A Fluffy Brush

F.Y.I  Its not a real MAC brush it came from china!

So you may have already guessed what you have to do! 
1. Start with Clean dry Lashes 
2.Using you fluffy brush pick up some face powder and dust your eyelashes and lower lash line with powder
3. Apply mascara


Now I'm not 100% sure whether the powder simply soaks up excess oil around the eye's to stop the smudging, but what I do know is that since using this little trick I haven't suffered with panda eyes!
I think that it also makes lashes a little more fluffy too!

(B.T.W I don't think it will be smudge proof if you rub at your eyes)

Hope you give this a go and I hope it works for you too!

The mascara I used was:

 Maybelline The Falsies Volume Express-Flared £7.99

&

Powder Was:

Maybelline Fit Me! in 125 £5.99

Jeni x