Monday, 1 February 2016

My Simple Skincare Routine


For me, simple is always better. And its not till I got really simple with my skin care did my skin settle down and begin to look good. I mean, I currently have the best skin of my life, and I do next to nothing with it! Interested? Keep on reading!

Night Time Skincare Routine |

Step one | Cleanse

To cleanse my skin of an evening I use a very simple DIY oil cleanser. Its a mix of Castor Oil & Walnut Oil. Both selected for different reasons. Castor Oil draws out dirt and impurities while Walnut Oil nourishes the skin, fights wrinkles and is a good remedy for infection.

I take 1 - 2 pumps (I re-used an old oil cleanser bottle from one of my love lula boxes) of oil, massage it over my face concentrating on removing my mascara then use a hot flannel to wipe it off. All it takes is two wipes and I'm done. I don't rinse or pat my face dry just allow it to air dry.

Recipe |


Be sure to sake before use as the castor oil is much heavier. You can change up your oils and customise your cleanser to you.

Step two | Tone

My toner is also another DIY. I love this stuff. I notice if I stop using it for just a couple of weeks, my skin starts to break out again, so I highly, highly recommend it! After my cleanse I take my toner on a cotton wool ball, and swipe it all over my face. If I have missed any dirt in my cleanse this picks it up.

Recipe |


I posted this recipe back in July, and since then I have added in one of my favourite spot busters, Witch Hazel. Its a natural astringent and skin cleanser, teamed with Tea Tree Oil Essential Oil, another beautiful antiseptic and Apple Cider Vinegar that regulates the skins ph levels, prevents spots and is also a wonderful help for oily skinned lovies this is my holy grail! This as you may have guessed is my spot prevention step. 
Although preventative I do end up with the odd red spot in which case I grab my tea tree EO and apply it directly to the spot, 1 day later, spots pretty much gone.

Dr.Organic Tea Tree Pure Oil £4.59 from Holland & Barrett

Step three |

Moisturise

Finally I moisturise. I take one pump of my Dr Bronners Orange Lavender Organic Lotion, its says for hands and body but you can use it all over, and smooth it in to my face and neck. And I'm done. If I find I need a little deeper nourishment because I've been outside all day or rubbed my face a lot, I'll use coconut oil instead. But I'm careful to use it no more than once a week as it can clog pores.

Dr.Bronners Orange Lavender Organic Lotion £8.49 from lookfantastic.com

I have had this lotion for at least 2 months and I'm about a quarter of the way through, I love it! It has lasted so well, my skin doesn't get nearly as oily has it did and its just the right amount of moisture for me.

Extras |

Once a month if I feel the urge to pamper myself I'll do a bentonite clay mask (I'll do a post on it) as a real deep cleanse.

Morning Skincare Routine |

All I do is remove step one, and replace with a simple wash with warm water and nothing else and repeat steps two and three.
Over the last 2/3 months I've also stopped using foundation and have found that this has in fact greatly improved my skin in collaboration with this skincare routine. I find now I hate wearing it and hate the way it makes my skin look! Never thought I'd hear myself say that! But with out all that makeup clogging up my skin its aloud it to breath and level out and look happy!


If you give any of this a try let me know how you get on!

Jeni xo


Tuesday, 20 October 2015

DIY | Verruca Treatment That WORKS!!!!


Verrucas. What can I say. They are evil, horrible little things that can be painful as well as unsightly.
So what are these demons? Verrucas are essentially a wart or a 'Plantar Wart' meaning its in the sole of your foot as apposed to on the surface of your skin.

Verrucas are caused by an infection of the skin by a virus called the Human Papilloma Virus (HPV), which is highly contagious. The viral infection is spread through skin contact with contaminated surfaces.

I got my first verruca about 6 years ago, my second about 2 years ago and my third this year. I had tried every over the counter product from Bazuka gel to the freezing kind. Nothing worked. I was so fed up, so I turned to the interwebz to do a bit of googling and found, one specific ingredient keep popping up. 

Vinegar, or more precisely Apple Cider Vinegar (ACV). I had nothing to loose I already had the vinegar so for me it was free and on the 9th of July I started my treatment. 

Treatment is simple. All you need is your ACV, some cotton wool and some heavy duty masking tape. Oh and a sock.

EVERY night, soak a small piece of cotton wool in ACV, place over the verruca and tape in to place. Pop a sock over your foot to keep it all in place and sleep with it on your foot ALL night. Remove in the morning. You must repeat this every night. However it can get a bit painful in the early days so a night off when its too much is fine.

The key to this treatment is PATIENTS and PERSISTENCE. It took me nearly 2 months but honestly its the best thing I have ever done for my verrucas.

Before I go on I'll warn you...there will be up close and personal pictures of my verrucas so sorry if your squeamish. But every forum I looked on only described the treatment, I really wanted to show how it looks so that if you suffer and want to try this you know what it will look like and basically not poop your pants like I did!


These were my verruca's on the 9th of July. The one that's 2 years old has been the most uncomfortable one as its right on the bend of my big toe on a callous.


This is the morning after. As you can see the ACV has cause the surrounding area to swell up and look uber gross and a little tender. From what I can guess, and please note this is just a guess. The swollen are I think is where the root of the verruca reaches. Over time it gets smaller.
Once the swelling receded, it wasn't painful and I could walk around as normal.
Over the next few weeks this is what I woke up to.


This is 5 days after I started treatment, taken in the evening before bed. As you can see the verruca has turned black and begun to scab and slowly die. (yay!)
On the forums it said that once it reaches this sort of stage you can use an emery board to begin to file down the scabbing. Some people said that they dug the scab out. That sounds really gross I'm sorry. But that is what I chose to do as well. After trying to file the scab down I took a pair of sterilised nail scissors as they are much sharper and pried this scab out of my foot. Each time I did this I could feel a tugging coming from deeper with in my foot, the root I would guess.
 I also took the thought that by doing it this way I would get the ACV in deeper. But it was also a uncomfortable way of doing it. Some nights my feet would really hurt so I would always take the night after off. I stand up all day at work so for me it wasn't ideal but I wouldn't change the way I did things.


As you can see over time the surrounding areas of the verrucas have become pink and tender looking as a result of over night ACV soaks the skin has also started to peel. Of a morning though now the surrounding area doesn't swell up as much and you can see the verrucas look no where near as deep as when I stated.

There was a long period of time where nothing really happened much after this but each time I poked at my verruca it didn't feel as deep as it once had.


This was taken today as you can see the ones on the sole of my foot have basically vanished, but the one on my toe is still visible although massively reduced. I haven't treated them for a few weeks. But I'm going to start treatment again on the one that's left.

I really hope that his helps anyone out there looking for an effective way to kill verrucas, I'm so happy that I found this and even more so that its natural and works!


Jeni xo

Wednesday, 7 October 2015

Review | Tangle Teezer


As my hair has got longer, its become more of a nightmarish tangle, so I thought I'd try out the Tangle Teezer well known for its kick arse knot fighting abilities.
The Tangle Teezer has fast become an iconic hair tool, with its bright colours and funky design.
I picked my teezer up from Boots for £10.99 and is the original design. It has 2 different lengths of soft, bendy plastic bristles, long and short in an alternating pattern and fits comfortably in the palm of my hand.

I have to say I was skeptical about whether this would work well, and after using it for a few months I can safely say its pretty good!

I wanted to do a comparison test to show how good the teezer really is. I don't normally brush my hair from root to tip when its wet but it was the best way to show how it works.

Before


Using a wide tooth comb I brush from the top of my head and immediately get stuck, so gently start again, then get stuck again and then again. Not so groovy.

After (just the right side)

 The tangle teezer is so smooth and took me 2 seconds to go through the left side of my hair


One of the down sides I must admit is is that fluff gets stuck in the bristles very easily. I took this picture a few hours later after my hair had dried and all the fluff from my jumper ended up in my brush! Its also not as smooth when I brush my hair dry, it can get stuck in some of the stubborn knots and take a few tries to work through. But all in all its a good brush and I would definitely would recommend it :)

Jeni xo


Wednesday, 9 September 2015

Review | John Freida Beach Blonde

Hi Guys!
I know its been rather a long time since my last post. Truth is I've had a lack of blogging motivation and haven't come across anything that has got me excited in a while.
But fear not! Today I come back with a review of John Freida's returning classic Beach Blonde.

I'm always chopping and changing hair products trying to find THE ULTIMATE products for my hair type but alas its still a searching struggle. I've tried it all from all natural shampoo bars (a dark time in my hair history) to a little more pricey-er chemical laden bottles of promise. I try to pick budget friendly products and if I can pick things on offer I will! This funky fresh little collection caught my eye and it was on offer so I went ahead and picked up the Cool Dip Purifying Shampoo and the Kelp Help Deep Conditioning Masque. In addition to the collection there is a Smooth Seas Detangling Conditioner and a Sea Waves Sea Salt spray to bring out your inner mermaid.


Information |

Brand | John Freida
Product | Cool Dip Purifying Shampoo & Kelp Help Deep Conditioning Masque
Size | 250ml (shampoo) 150ml (masque)
Price | £5.89 each (I bought each for £4.00)
Made in | the E.U
Would I re-purchase | yes! 

Shampoo Ingredients |
Aqua, Sodium Laureth Sulfate, Cocamidopropyl Betaine, Coco-Glucoside Sodium Chloride, Betaine, Parfum, Cocamide Mea, Benzyl Alcohol Polyquaternium-7, Dipropylene Glycol, Malic Acid, Menthyl Lactate, Menthol, Disodium EDTA, Ethylhexyl Methoxycinnamate Benzophenone-4, Glycine, PPG-9 Butylene Glycol, Propylene Glycol Mentha Piperita Leaf Extract, Methylchloroisothiazolinone, Sodium Hydroxide, Methylisothiazolinone Fucus Vesiculosus Extract, CI 15985, CI 42090, Limonene, Linalool.
Masque Ingredients |
Aqua, Cetearyl Alcohol, Dimethicone, Behenamidopropyl Dimethylamine, Glycerin, Parfum, Stearyl Alcohol, Cetyl Esters, Isopropyl Palmitate, Benzoic Acid, Benzyl Alcohol, Lactic Acid, Propylene Glycol, Behentrimonium Chloride, Mentha Piperita Leaf Extract, Disodium EDTA, Menthol Menthyl Lactate, Polyquaternium-28, Glycine, Malic Acid, Ethylhexyl Methoxycinnamate, Benzophenone, Caprylic/Capric Triglyceride, Laminaria Ochroleuca Extract, Methylchloroisothiazolinone, Cetearyl Glucoside, Methylisothiazolinone, Prunus Amygdalus Dulcis Oil, Cocos Nucifera Oil, Gardenia Tahitensis Flower Extract, CI 15985, CI 42090, Limonene, Linalool

At the time I bought these I was messing around with my hair care routine and washing my hair too frequently so my natural shampoo was leaving a residue. I bought the shampoo to deep clean my hair and the masque just damn tempted me! I use these maybe once a week to clear away any product build up. Lets start with the scent. OMG this stuff smells beyond amazing! Its fresh, its minty, it smells clean and by golly the sent stay in your hair for days! 
The shampoo does a great job of stripping away dirt and grime and leaves hair feeling fresh and clean, I always use it in conjunction with the hair masque; which in turn leaves hair feeling wonderfully soft. I leave it in for about 3 minutes, longer if I'm enjoying a bath and wash it out well. I suspect that this (the masque) is what really leaves its sent behind.
Pricing wise I don't think its too bad a price for the shampoo as it lasts ages. Its quite a thick clear shampoo and you can't squeeze too much out of the bottle so you won't over use the product, but the masque is such a tiny amount for the money, you want to use it sparingly, a little does go a long way but its too costly in my eyes, even if it does smell like heaven!
All in all I have enjoyed using these products and will continue to do so till they are all used up and I move on to my next search!

Jeni xo


Friday, 17 July 2015

D I Y | Distressed Cut Offs


It came to my attention the other day that I lacked a pair of black jean shorts, and I really wanted a pair, but as I'm currently 'economising' I decided to ransack my wardrobe for an old pair of black jeans I don't really wear. I've hacked up quite a few pairs of jeans in my time, creating total cock ups along the way. Most of the time they would end up with one leg longer than the other or just looked like totally lame cut offs that I did myself (which...duh? I did!). But as times gone on and about 10 pairs of jeans have met a scissory end at my hand I have finally devised a fool proof cut of plan!


1 | Select your jeans
2 | Turn them inside out and fold them over
3 | Place a pair of shorts on top as a guide line reference
4 | Using a white eye liner draw dashes along your jeans to guide your scissor happy hands


5 | Cut along your dotted line
6 | Re-fold your jeans so you now have a new guideline
7 | Using your white eyeliner again create your second set of lines
8 | Cut along the dotted line again


At this point I usually try on my shorts to see how the fit and how long they are once folded. I had to cut about another inch off to reach the length I was after.


9 | I've found the best way to fray the raw edge of your jeans is to use the inner most part of blunt scissors and scrape backwards and forwards to achieve a frayed edge
10 | Once your happy with your fray, fold up the edges and sew the very inner parts to keep the fold in place and the very outer part
11 | To create your holes pinch together the fabric
12 | ...and cut!


Use the same fraying techniques on your holes


One of the holes I made was over a pocket so a decided to sew in a patch from an old shirt to give the shorts a little character.


And your all done! Each time you wear them and wash them the will become a little more frayed and distressed looking.


Wednesday, 15 July 2015

D I Y | Apple Cider Vinegar & Tea Tree Toner

I've experimented with a lot of DIY beauty treatments over the years and this toner is one of my faves!
Its very easy to make and if you already have the ingredients it doesn't cost a penny!

Here's what you will need:

+ a bottle to keep your toner in, I like this one by KILNER
+ Apple Cider Vinegar (aka cider vinegar) you can get this from any supermarket
+ Tea Tree Oil I used this ONE
additionally
+ Rosemary Oil
+ Argan Oil


This was originally inspired by an old BUBZBEAUTY video. Each time I've made it I have changed and adapted it for what works best for me. I 100% recommend getting one of these kilner bottles it keeps the toner fresh till the last drop!
What I love about it is that its 100% natural and works so well. Since I've settled on this formulation my skin has been getting better and better. I still get the occasional mini break out that consists if maybe 4 or 5 tiny spots and I've been going out more and more with only a sweep of blusher or bronzer on my cheeks for colour (no foundation!!!).

Now I'll quickly share why I've picked each ingredient.

Apple Cider Vinegar | helps to prevent acne, stimulates circulation and if your unlucky to get a little sun burnt, helps with that too!

Tea Tree Oil | like acv it helps to treat acne and has natural antibacterial properties

Argan Oil | its liquid gold! Adds a kick of hydration to the formula and helps to soften the skin

Rosemary Oil | contains a wide variety of nutrients such as iron, calcium, vitamins and antioxidants and is also a natural astringent (smells amaze too!)


Jeni xo


Wednesday, 10 June 2015

D I Y | Gentle Exfoliator


I've found so many physical exfoliator's to be incredibly harsh and scratchy. Some are even having a detrimental effect on the environment especially any that contain "micro beads" which are actually made of polyethylene. Tiny plastic beads that get washed down your drain and end up in the ocean where they are being ingested by sea life.
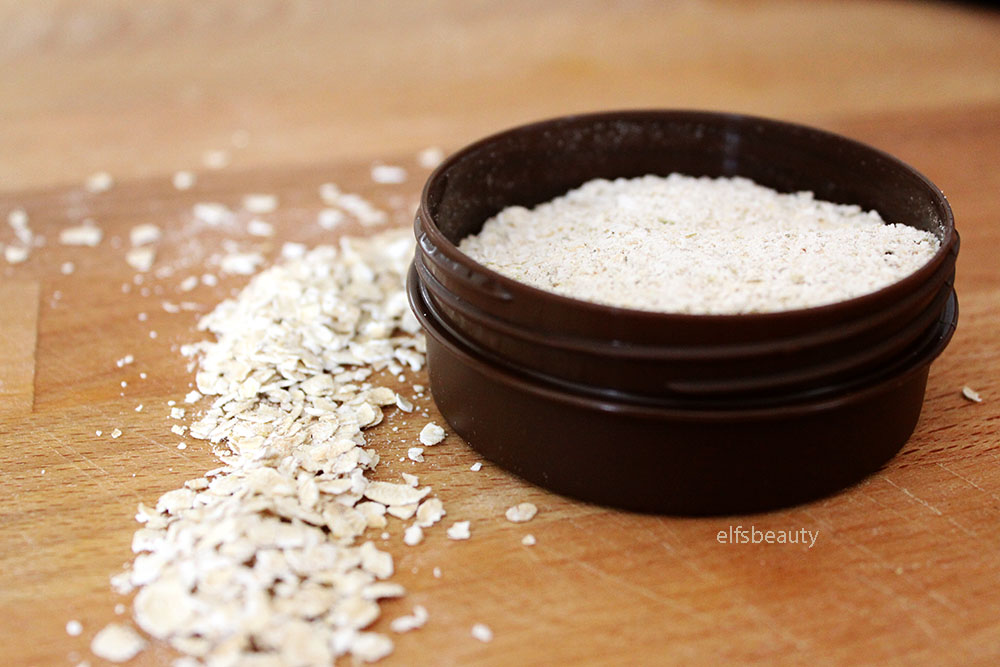
So in a bid to find a gentle exfoliator that does more good than harm I rediscovered an old beauty favourite: Rolled Oats.

Exfoliator Ingredients |

Rolled Oats
Chamomile Teabag

Method |

Empty one teabag in to your grinder with a handful of oats, and grind in to a fine powder. Transfer to a tub of your choice and your done!
Easy as pie!
To use simply take a couple of pinches of the powder and wet it a little, then massage on to skin. Rinse with warm water. You may need to use a face cloth to remove all traces of oats. You can this once a week, twice a week or its gentle enough to use every day.
I'm sure I don't need to say that if you have an intolerance to oats, not to use this, bur you know if you do, don't.


The exfoliator has a soft milky texture that smells all oaty and delicious. A few great benefits to know  about is that this is a great skin softener and natural moisturiser. It has anti-inflammatory properties, great at dealing with dry, itchy skin and wonderful and speeding the process of small cuts and abrasions. Perfect for anyone with acne prone or sensitive skin.

Hope you enjoyed this post!

Jeni xo