Sunday, 6 April 2014

Quick Tips | DIY Silver Cleaner

We all have a silver necklace or bracelet that we haven't worn in a while that has gone tarnished and black. The other day I went to put on a little locket my brother bought me a few Christmases back and it was looking a little unloved and tarnished. Then I remembered reading somewhere about a very unlikely silver cleaner and thought, heck I'll give it a whirl, and it works, amazingly!

So I'm going to show you how to go:

Using one ingredient that we all have in our homes...Toothpaste!

Our unlikely hero in this epic adventure!

Now you might be thinking toothpaste really? But trust me it works like a charm! Why does it work? Most jewelry cleaners contain a mixture of water and baking soda just like toothpaste. Its non-toxic and easy to clean up (make sure you do this over the sink!) Toothpaste contains mild abrasives which will help to remove staining on your silver. Just keep in mind the toothpaste could scratch your jewelry so be gentle!


Step 1: Get your neck lace and your toothpaste. You can use a bit of tissue or a cloth if you don't want to get it on your fingers but I'm not fussy so I'm using my fingers.


Step 2: Rub the toothpaste all over your necklace/pendant


Step 3: You'll start to notice the toothpaste turning grey and your necklace looking oh so clean and sparkly!


Step 4: Once your done simply rinse with water and pat dry and enjoy your clean necklace!

This little trick works well on all tarnished metals too, its cheap and is something that we will all have in our bathroom cabinet! 

Hope you give this a try!

Have a great Sunday!

Jeni x


Wednesday, 2 April 2014

DIY | Crayon Tinted Lip Balms

Aloha!

A few weeks back I saw a couple of videos on you tube on how to make your own lipsticks using crayons which looked really cool and easy to do, so today I decided I would give it ago! 
I played about a bit with ratios to see what worked best. 

What you're gunna need:

~ Coconut Oil
~ Crayons        
~ Containers     

in addition

~ a double boiler (heat proof bowl + frying pan + hot water)
~ spoon 
~ bowl of HOT water for clean up
~ kitchen towel


Step 1~ Set your hob on a low heat, we have electric so I set it at 4


Step 2~ Decide on your crayon colour


Step 3~ Melt half a teaspoon of coconut oil in your heatproof dish


Step 4~ Melt your crayon!

So this is my first attempt. I used half a teaspoon of coconut oil and a whole crayon. I ended up adding in an extra quarter of a teaspoon of coconut oil as the mixture was really thick.

This looks so much more orange than it ended up. Its more of a red/coral colour.

The consistency of this lip balm was quite thick. I don't think using a whole crayon worked overly well it didn't seem to melt properly.


The best ratio I worked out was the last one. It worked out to be a little over half a whole crayon with half a teaspoon of coconut oil. I only had 3 pots to work with so when I have another free pot I'll be trying some more.


Step 5~ Pour into your container and allow to cool at room temperature. It doesn't take very long at all. They all cooled off with these little bubbles in, but that nothing to worry about. Once they have set, they are quite hard, so to use press down quite firmly and rub round like you would a Vaseline, alternatively warm up in a microwave (DO NOT do if you used a metal tin) for about 20 seconds, or keep it in your pocket.


The end result is a very sheer colour which will tint your lips rather than make a colour statement. But in large part I think that actually has something to do with thequality of crayon you choose to use. I used cheepo ones from Asda (their own brand) while all of the tutorials I watched used Crayola. So while in the pots these lip balms look really vibrant and pigmented they don't give the impact that I thought they would. So maybe next time I'll spurge and get the Crayola ones!

On my lips the colours are very subtle and the overall feel is not to dissimilar to Vaseline. My lips feel moiturised and have a nice sheen to them. 

Hope you give this ago. I'll defiantly be re-attempting this in the future and I will be using my little tinted lip balms because I like 'em!

Have a great day!

Jeni x


Wednesday, 26 March 2014

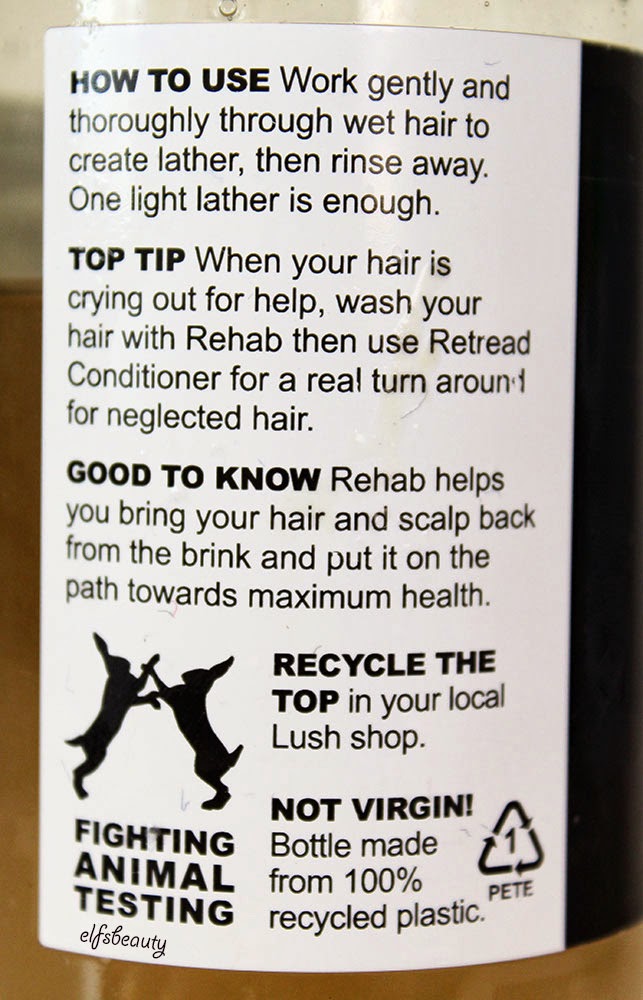
Review | Lush Rehab Shampoo & American Cream Condtioner

I'm relativity new to Lush products and when I asked an friend who's bit of a Lush Addict what their hair care was like she said it was worth a try. So I went out and bought some! I've been using these 2 now for about 2/3 months.


Information 

Brand| Lush
Product| Rehab Shampoo
Price| £10.45
Size| 250g
Would I repurchase| Not in the near future!

In a nut shell this is meant to be like rehab for tiered stressed out tresses. The ingredients list is full of natural oils, fruit juices and enzymes to give your scalp a thorough clean. I use this solely on my scalp to clear away grease and...dead skin cells (mm so nice to think of). It smells so divine, its fresh and minty and I do enjoy working it in to a lather on my noggin. Consistency wise its quite runny and very clear. It has a similar colour to olive oil just a little less yellow.

The downside, though full of natural ingredients, it still has parabens and sulfates. 
After using this I do feel like my scalp has had a good clean and feels nice and fresh. Bonus is that I don't have to use loads either so its lasting me well.
Then only thing that puts me off repurchasing is that it is a little on the expensive side for me, when I bought this I was feeling a little more luxurious with my money than normal! Plus the general idea of a shampoo is to just cleanse the scalp, not your hair as in general the length of your hair takes care of its self and suds from washing out the shampoo are good enough. So I think my next shampoo buy will be much cheaper and hopefully sulfate and paraben free.


Information

Brand| Lush
Product| American Cream Conditioner
Price| £8.95
Size| 250g
Would I repurchase| Maybe!

So this is meant to be a really creamy conditioner to make your hair happy! First off again it smells so yummy! Like citrus-vanilla, and the scent stays in your hair ALLL day. The first time I used it I kept sniffing my hair, like the weirdo I am. But it does smell so good! I've found you need quite a lot of it though, as I work it through the lower three quarters of my hair it just disappears. It has a very runny thin consistency (and is says its thick...the lies!) for a conditioner, I'm more used to ones a little bit thicker.


Terms of hair softness, I'd say my hair is no softer then it is with any other conditioners that I have used. My hair is pretty manageable after its washed wish is nice, but I think in part that is to do with the fact that I don't comb/brush/touch it while its wet. (I'm thinking I might do a hair care tips post...yay or nay?) 
Overall though I'm not going to rush out and buy it again (its almost empty) but I can imagine buying it again simply for the yummy smell factor!


Have your tried any Lush hair care? What would you recommend? 

Future Lush Reviews:
No Drought
Mint Julips
Roots
Jeni x


Saturday, 22 March 2014

Faux FishTail Braid


This is a super easy faux braid inspired by bebexo's TUTORIAL. After I'd watched it, I realised I'd done a hair style using the same technique last year. What I love about this braid is that it is loose, romantic and effortless looking. Looks fab with curly hair and if you struggle with the regular fishtail braid this could be your saviour, plus its great for layered hair! Click on the link above to view bebexo's tutorial!

Such a bad image sorry about that! 


Jeni x

Thursday, 20 March 2014

Package from Korea #3 | Un-Boxing

So you may or may not know that I have an interest in the Korean/Asian beauty market. The products are always so nicely packaged and so much more exciting to use, for me anyway. Plus you can't get them where I live, unless some one knows of where I can get them UK South-East?! But part of the joy and excitement comes from buying online and waiting for it to arrive! I missed this one yesterday so went to pick it up today from the post office and thought I would do an un-boxing post. But I'm not going all the way (you'll see what I mean), I'll save that for the future reviews!

So we have 2 boxes all wrapped in bubbly-wrap...so excite!

So here we have the Mizon All In One Snail Repair Cream, Mizon Snail Repair Intensive Ampoule, Tony Moly I'm Real Lemon Brightening Lotion (sample), Tony Moly I'm Real Tea Tree Sebum & Pore Lotion (sample) & Tony Moly I'm Real Avocado Rich Cream (sample). Not to forget the thank you card!

I got my cream and ampoule as a deal on ebay for £18.04 so that's £9.02 each which is a bargain if it can deliver what I've read!

One of the biggest perks with buying Korean is that you always get some samples thrown in to give a try, I have a growing pile to try out!

And yes you did read me right. These two products contain snail filtrate or snail slime. Now to most people the idea of putting a product on their face that contains 92% snail filtrate is kind of disgusting, but to the curious beauty-blogger its exciting. And no I haven't gone mad! I've read and watched reviews that all say how A-mazing snail filtrate is for the skin (great for spots, scars anti-aging, wrinkles). I even heard on the radio a while back there is a new spa treatment hitting the UK that involves putting snails on your face (not garden snails though) and letting them have a crawl around! Don't believe me? Just click HERE!

I'm not going to go in to too much product detail, I'll save that for the reviews! But I'm so excited to try these out and see if they work for me! Mizon also do a Snail Repair BB cream that is on my to buy list and a facial wash too. 

Hope I've piqued your interest! 

Jeni x

Other Korean Beauty Posts:


Wednesday, 19 March 2014

Happy 1st Birthday Elf's Beauty


Today marks the 1 year birthday of this blog! I'm so excited and proud that I kept this up for a full year and have no intentions of quitting it anytime soon! For me this is a huge personal achievement and part of that is due to how much I love blogging :)
Time to say a quick thank you to all my followers and supporters, there isn't many of your but I truly appreciate your support :) Thank you. 
I look forward to another year!
And to the girls at work, hope you enjoyed the cakes! 
Seen my very FIRST post? A little haul from Primark to get me started!

Thanks guys! Have a great day :) 

Jeni x

Tuesday, 18 March 2014

Tutorial | Easy Smokey Brown Eyes

I'm not one for wearing much eye makeup on a day to day basis but I do love to play about with it. I came up with this super simple very wearable and almost natural smokey brown look.

What I used to create the look

MUA: Undressed Eye Shadow Palette £4.00 | Maybelline NY Colour Tattoo in On & On Bronze £4.99 | Collection 2000 Gel Liner in Brown £4.99

MUA Waterproof Eyeliner £1.00 | Soap&Glory Its About Prime £8.00 | L'Oreal Volume Millions Lashes £10.99 | Rimmel Scandaleyes Waterproof Khol Liner in Nude £3.99

Click to Enlarge!

1| Prime your lids
2| Using Shade 3 from the Undressed Palette neutralise eyelid colour
3| Apply On & On Bronze over this using your finger
4| Take Shade 10 and blend it into your crease
5| Using a brown gel liner, line eyes close to lash line, doesn't have to be neat
6| Go over your gel liner with Shade 8
7| Use Shade 8 to deepen colour in your crease
8| Apply Shade 8 to the lower lash line about half way
9| Curl lashes
10| Apply mascara
11| Line your water line using the Scandaleyes khol pencil in nude to make the eye look cleaner and brighter
12| Using MUA waterproof liner line your tightline close to the lashes
13 Apply Shade 1 to the inner corner of your eye to brighten it up & your done!


For my lips I just went with my Vaseline Rosy Lips for a natural colour. Hope you liked this look! Have a great day!

Jeni x