Friday, 17 July 2015

D I Y | Distressed Cut Offs


It came to my attention the other day that I lacked a pair of black jean shorts, and I really wanted a pair, but as I'm currently 'economising' I decided to ransack my wardrobe for an old pair of black jeans I don't really wear. I've hacked up quite a few pairs of jeans in my time, creating total cock ups along the way. Most of the time they would end up with one leg longer than the other or just looked like totally lame cut offs that I did myself (which...duh? I did!). But as times gone on and about 10 pairs of jeans have met a scissory end at my hand I have finally devised a fool proof cut of plan!


1 | Select your jeans
2 | Turn them inside out and fold them over
3 | Place a pair of shorts on top as a guide line reference
4 | Using a white eye liner draw dashes along your jeans to guide your scissor happy hands


5 | Cut along your dotted line
6 | Re-fold your jeans so you now have a new guideline
7 | Using your white eyeliner again create your second set of lines
8 | Cut along the dotted line again


At this point I usually try on my shorts to see how the fit and how long they are once folded. I had to cut about another inch off to reach the length I was after.


9 | I've found the best way to fray the raw edge of your jeans is to use the inner most part of blunt scissors and scrape backwards and forwards to achieve a frayed edge
10 | Once your happy with your fray, fold up the edges and sew the very inner parts to keep the fold in place and the very outer part
11 | To create your holes pinch together the fabric
12 | ...and cut!


Use the same fraying techniques on your holes


One of the holes I made was over a pocket so a decided to sew in a patch from an old shirt to give the shorts a little character.


And your all done! Each time you wear them and wash them the will become a little more frayed and distressed looking.


Wednesday, 15 July 2015

D I Y | Apple Cider Vinegar & Tea Tree Toner

I've experimented with a lot of DIY beauty treatments over the years and this toner is one of my faves!
Its very easy to make and if you already have the ingredients it doesn't cost a penny!

Here's what you will need:

+ a bottle to keep your toner in, I like this one by KILNER
+ Apple Cider Vinegar (aka cider vinegar) you can get this from any supermarket
+ Tea Tree Oil I used this ONE
additionally
+ Rosemary Oil
+ Argan Oil


This was originally inspired by an old BUBZBEAUTY video. Each time I've made it I have changed and adapted it for what works best for me. I 100% recommend getting one of these kilner bottles it keeps the toner fresh till the last drop!
What I love about it is that its 100% natural and works so well. Since I've settled on this formulation my skin has been getting better and better. I still get the occasional mini break out that consists if maybe 4 or 5 tiny spots and I've been going out more and more with only a sweep of blusher or bronzer on my cheeks for colour (no foundation!!!).

Now I'll quickly share why I've picked each ingredient.

Apple Cider Vinegar | helps to prevent acne, stimulates circulation and if your unlucky to get a little sun burnt, helps with that too!

Tea Tree Oil | like acv it helps to treat acne and has natural antibacterial properties

Argan Oil | its liquid gold! Adds a kick of hydration to the formula and helps to soften the skin

Rosemary Oil | contains a wide variety of nutrients such as iron, calcium, vitamins and antioxidants and is also a natural astringent (smells amaze too!)


Jeni xo


Wednesday, 10 June 2015

D I Y | Gentle Exfoliator


I've found so many physical exfoliator's to be incredibly harsh and scratchy. Some are even having a detrimental effect on the environment especially any that contain "micro beads" which are actually made of polyethylene. Tiny plastic beads that get washed down your drain and end up in the ocean where they are being ingested by sea life.
So in a bid to find a gentle exfoliator that does more good than harm I rediscovered an old beauty favourite: Rolled Oats.

Exfoliator Ingredients |

Rolled Oats
Chamomile Teabag

Method |

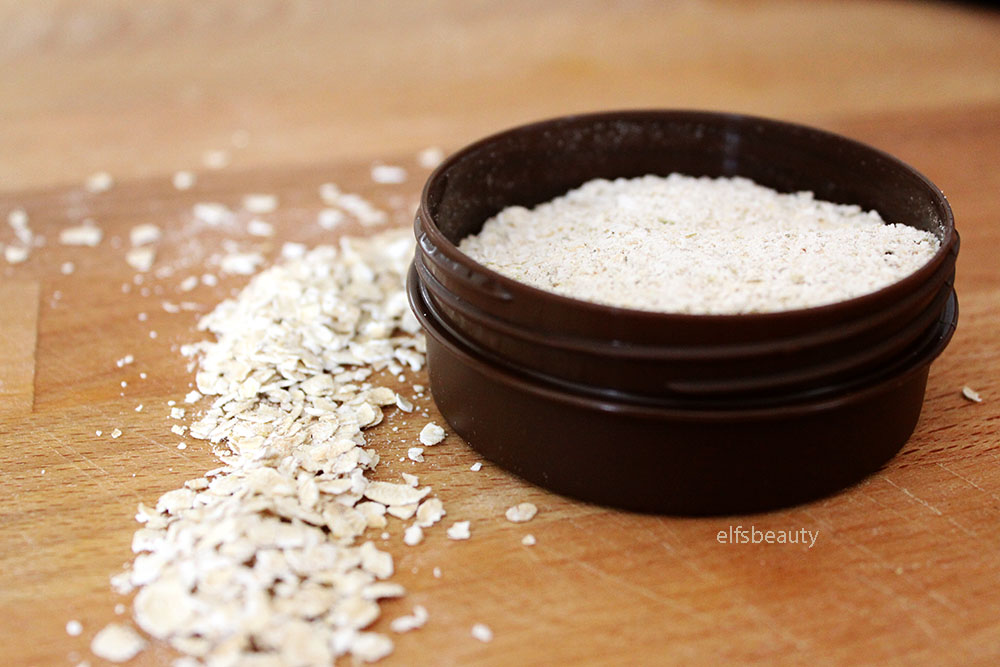
Empty one teabag in to your grinder with a handful of oats, and grind in to a fine powder. Transfer to a tub of your choice and your done!
Easy as pie!
To use simply take a couple of pinches of the powder and wet it a little, then massage on to skin. Rinse with warm water. You may need to use a face cloth to remove all traces of oats. You can this once a week, twice a week or its gentle enough to use every day.
I'm sure I don't need to say that if you have an intolerance to oats, not to use this, bur you know if you do, don't.


The exfoliator has a soft milky texture that smells all oaty and delicious. A few great benefits to know  about is that this is a great skin softener and natural moisturiser. It has anti-inflammatory properties, great at dealing with dry, itchy skin and wonderful and speeding the process of small cuts and abrasions. Perfect for anyone with acne prone or sensitive skin.

Hope you enjoyed this post!

Jeni xo

Monday, 1 June 2015

Review | Boots Botanics 81% Organic Hydrating Day Cream


As you may know I've started to incorporate more natural products in to my life. I had been using argon oil as a daily facial moisturiser but decided I wanted to try something different for a little while and when I found this in Boots and it didn't cost the earth I grabbed up a tub to try.

Information |

Brand | Botanics
Product | Hydrating Day Cream (81% organic)
Price | £8.99
Size | 50ml
Purchased from | Boots
Made in |
Would I re-purchase | yes

Ingredients |

Aqua (Water), Simmondsia chinensis (Jojoba) seed oil*, Butyrospermum parkii (shea) butter*, Glycerin*, Rosa canina seed oil*, Cetearyl glucoside, Theobroma cacao (Cocoa) seed butter*, Cera alba (Beeswax)*, Glyceryl stearate, Alcohol denat.*, Cetearyl alcohol, Xanthan gum, Sodium benzoate, Limonene, Potassium sorbate, Citric acid, Citronellol, Pelargonium graveolens flower oil, Citrus aurantium dulcis peel extract*, Linalool, Citrus aurantium bergamia (Bergamot) fruit oil, Citrus medica limonum (Lemon) peel oil, Geraniol, **Parfum (Fragrance), Citral
* Ingredients certified as organic by the Soil Association for use in cosmetic products
** Ingredients certified as organic by the Ecocert Association for use in cosmetic products

Product Description |
This hydrating organic moisturiser glides onto the skin to soften and help improve texture.
Rosehip is combined with Jojoba Oil and Cocoa Butter to instantly nourish and leave skin looking fresh and radiant.
Rosehip is nature's nourishing gem. The seeds are a rich source essential Omega oils, which help to improve suppleness and keep all skin types beautifully soft and healthy looking.
Our beauty scientists use active plant extracts approved by Royal Botanic Gardens, Kew, to bring you beautiful skincare that's proven to work.
  • We've taken steps to reduce our impact on the planet at every stage in this product's journey.
  • Formulated without parabens.


I love how plain and simple the packaging is. Its not loud and shouty just simple white with a little colour, nice and clean looking.
I've been using this for over a month maybe even 2 months now. The scent is rosehip and its really lovely and fresh but quite strong which I personally don't mind but others might.
The cream itself is very thick but once your rub it between your fingers it melts and smooths in well enough. 
On application it feels wonderful and soothing and leaves my skin looking matte. Its a bit hit and miss under different foundations though due to the mattifying effect. If you have a foundation that's more on the thicker side eg/ Revlon Colour Stay it can be a bit difficult to get an even coverage, in my personal experience that is. If the foundation is lighter its not too bad, but I have found my self reaching for a little coconut oil to add after to make my face more slippery for foundation application.
Its a brilliant formulation with so many organic, natural ingredients and because its so thick a little goes a long way so it lasts a really long time. I know I have at least another months worth of product in the tub so makes it good value for money. I'd love to try more from the line, not all of the Botanics range is as organic and natural as this one, but the ingredients are much nicer than your run of the mill.


Hope you've enjoyed this review,
Till next time

Jeni xo

Wednesday, 20 May 2015

I Had a Reaction

Hi guys!
Long time, no post!
Sorry about that, my life's been a bit crazy of late and I've been uber distracted and its likely to continue on off, but when the time comes I'll do a 'Life Update'...maybe to explain all the craziness!

Anyhoo...you may of read at the beginning of last month I had started using a natural, homemade deodorant that I loved, super, super much. Well I had a reaction to it, so I've had to stop using for the time being. I think/know its due to the amount of Baking Soda I used in the formula. I hadn't realised how bad it could be, the amount of baking soda + daily usage left my poor pitty's looking rather sorrowful and sore.


***WARNING GRAPHIC ARMPIT PHOTO PROCEED WITH CAUTION***


Each one of these spotty bumps was so painful. I wasn't sure what was happening so continued to use my deodorant for a bit longer, then when they didn't get better, hit up google to find out what was wrong. When I did, I immediately stopped using my DIY deodorant and forwent all deodorant until the inflammation went down which took about 1-2 weeks. Since then I've gone back to using my Dr.Organic Manuka Honey deodorant. And you know what, it sucks! I've been getting uber sweaty and sometimes a bit smelly, que sad face :(
So I have decided to try and re-formulate this DIY deodorant using much less baking soda and more types of oil. I haven't fully figured out what yet but I'm willing to give it another shot.
Cross fingers it works better this time and once I'm 100% sure its good and proper I'll post a Natural DIY Deodorant 2.0!

Jeni xo

*****UPDATE 31st MAY*****

10 days ago I made my new natural deodorant and started using it, and 8 days ago my armpits got sore so I quit my deodorant, today I had 2 big painful spots, one in each arm pit :( Needless to say I have 100% given up with making my deodorant. I used the Dr Organic Manuka 'Honey deodorant again today but decided to apply 2 coats, and it actually worked 1000 times better this way. So I think I'll continue with it and hope for the best!

Jeni xo

Thursday, 23 April 2015

Review | Sukin Cream Cleanser


As you may know, over the last few months I've become increasingly aware of what products I'm using and what I'm allowing my body to absorb through topical application. Its an on going and slow transition between the using up of old products and the replacing with newer, healthier ones. Today I'm sharing my thoughts on the Sukin Organics cream cleanser. But before I move on to the review I thought I would share a bit of research on the brand. I love a good bit of research and I think knowing where your product has come from is becoming a must for me.

About the Brand |

Sukin Organics are an environmentally conscious Australian company that offer over 50 carefully crafted personal care products produced with the best natural ingredients. Free from harsh chemicals such as Sodium Lauryl Sulphate (SLS) Sodium Laureth Sulphate (SLES), synthetic fragrencense, animal derivatives, harsh detergents, propylene glycol, artificial colours, triethanolamine, mineral oils, EDTA, or parabens. 
Sukin also aim to 'give back' to local communities, aligning with a variety of eco-initiatives each year.

Product Information |

Brand | Sukin
Product | Cream Cleanser Sulphate & Paraben Free
Price | £8.15
Purchased from | Holland & Barrett
Made in | Australia 
Would I re-purchase | Yes!


Let me start by saying how beautiful this smells. It has a fresh citrusy-orange scent. Its light and creamy and a dream to use. I use it both morning and night, at night as a secondary cleanser to my oil cleanse. It doesn't dry out my skin and leaves it feeling clean and fresh and ready to take on the day!
Its not what I would choose to remove my makeup at night but can get the job done if needed.
There are a couple of ways to use this, you can either apply the cream, the swipe off with a cotton pad, or how I use it which is massage it on then remove with water. I don't take this off with my flannel, just water and my hands. Its become a firm favourite for me and something I will definitely buy again, and maybe even try more of this wonderful brand!

Jeni xo


Monday, 20 April 2015

H.H.A | Bantu Knot's

Hi Guys!

Its been a while since I've done a Heatless Hair Adventure, and when I saw the tutorial for the Bantu Knot and the beautiful Spiral Curls it creates I had to give it ago! So true to HHA I haven't ever done this before and its my very first attempt! So here's a lovely little pictorial on how to do them!


Step 1: You want to brush out all of the knots and tangles in you hair. It needs to be nice and smooth.
Step 2: Start with a front middle section and begin twisting and wrapping the hair to form a spiral bun, it should sit on top of your head all crazy like, then bobby pin in place.
Step 3: Repeat. So Grab more sections, these can be as big or as small as you like twist, wrap and pin all over your head. 
Step 4: Mist with water and leave over night or for at least 4 hours.

* Tip * try not to wrap too tightly at the base, they start to get tighter as you go, and they can be a tad uncomfortable!* 

4 hours later...


After 4 hours my scalp was screaming at me so I decided to de-pin and unravel my knots and separate them. The end results were...not how I'd imagined/hoped. I'm not sure if I should of maybe put some product in or dampened my hair more before wrapping but these are my curls after 4 hours, I have added in some serum and some curl gel.

I do plan on trying this method again, and when I do I'll be sure to update!

Jeni xo